Compilar e Instalar Asterisk
Install Development Tools
sudo dnf group -y install "Development Tools"
sudo dnf -y install git wget
Install Asterisk
Downloading and Configuring the Asterisk Build¶ Before you download this script, make sure you have the latest version. To do so, navigate to the Asterisk download link here and look for the latest build of Asterisk. Then copy the link location. As of the writing of this document, the following was the latest build:
wget http://downloads.asterisk.org/pub/telephony/asterisk/asterisk-20-current.tar.gz
tar xvfz asterisk-20-current.tar.gz
cd asterisk-20.0.0/
Before running the install_prereq below (and the remaining commands), you are going to need to be the superuser or root. It's much easier at this point to get into sudo permanently for a while. We will exit back out of sudo later in the process:
sudo -s
contrib/scripts/install_prereq install
You should see the following when the script completes:
#############################################
## install completed successfully
#############################################
Now that all of the required packages are installed, our next step is to configure and build Asterisk:
./configure --libdir=/usr/lib64 --with-jansson-bundled=yes
Assuming that the configuration runs without issue, you should get a large ASCII Asterisk emblem, followed by the following on Rocky Linux:
```python
configure: Package configured for:
configure: OS type : linux-gnu
configure: Host CPU : x86_64
configure: build-cpu:vendor:os: x86_64 : pc : linux-gnu :
configure: host-cpu:vendor:os: x86_64 : pc : linux-gnu :
Set Asterisk menu options [For more options]
```
This is one of the steps where the administrator is going to need to do his homework. There are a lot of menu options that you may or may not need. Running the following command:
make menuselect
will bring you to a menu select screen:
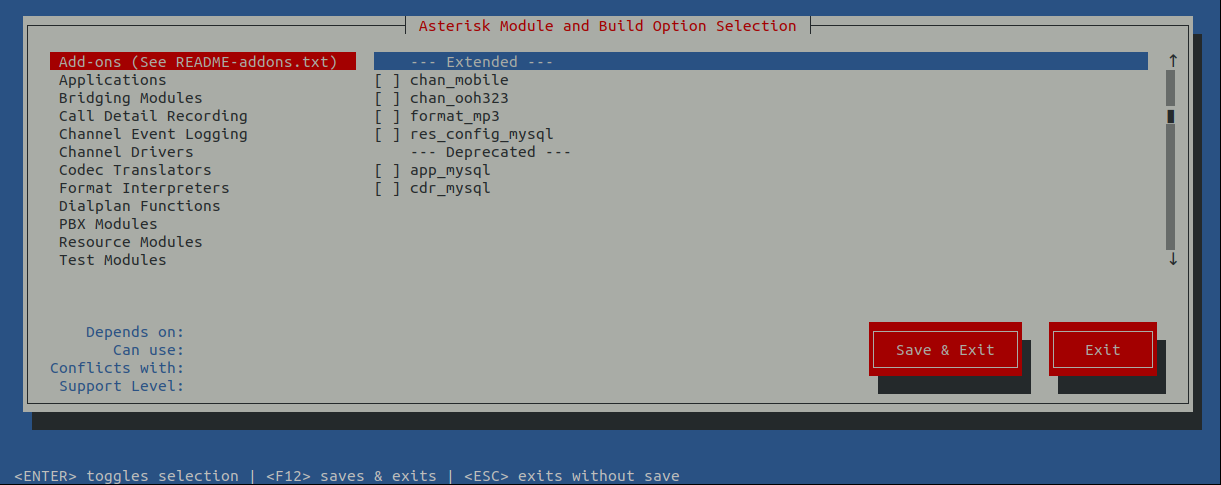
Look through these options carefully and make selections based on your requirements. As stated earlier, this may take some additional homework.
Build and Install Asterisk
To build, we want to execute the following commands in succession:
make
make install
Installing the documentation isn't required, but unless you are a communications server expert, you'll want them installed:
make progdocs
Next install the basic PBX and make the config. The basic PBX is just that, very basic! You will probably need to make changes going forward to get your PBX to function as you want it to.
make basic-pbx
make config
Asterisk Configuration
Create User & Group You'll need a specific user just for asterisk. Might as well create it now.
groupadd asterisk
useradd -r -d /var/lib/asterisk -g asterisk asterisk
chown -R asterisk.asterisk /etc/asterisk /var/{lib,log,spool}/asterisk /usr/lib64/asterisk
restorecon -vr {/etc/asterisk,/var/lib/asterisk,/var/log/asterisk,/var/spool/asterisk}
Now that the bulk of our work is completed, go ahead and exit out of the sudo -s command. This will require that most of the remaining commands use sudo again:
exit
Set Default User & Group
sudo vi /etc/default/asterisk
Remove the comments on the two lines below and save:
AST_USER="asterisk"
AST_GROUP="asterisk"

sudo vi /etc/asterisk/asterisk.conf
Remove the comments on the two lines below and save:
runuser = asterisk ; The user to run as. rungroup = asterisk ; The group to run as.
Configure Asterisk Service
sudo systemctl enable asterisk